-
For Resellers
-
-
For Clients
-
-
WHMCS Integration
Add Application.
With the “Add Application Service” feature in MojoCP, you can quickly and easily add new applications to your streaming video service. This allows you to expand the types of content you offer to your clients, as well as give them even more control over their streaming video experiences.
To use this feature, simply navigate to the “Services” section in your MojoCP control panel and click the “Add Application Service” button. From there, you can name your application and choose its type (e.g. on-demand, live streaming, IP camera, etc.). You can also configure a variety of advanced settings, such as your streaming protocol, bitrate, and storage location.
Once you’ve configured your new application, you can immediately begin streaming content to it and grant access to your clients. This feature is an essential tool for any reseller looking to provide a comprehensive, customizable streaming video service to their clients.
Coming Soon..
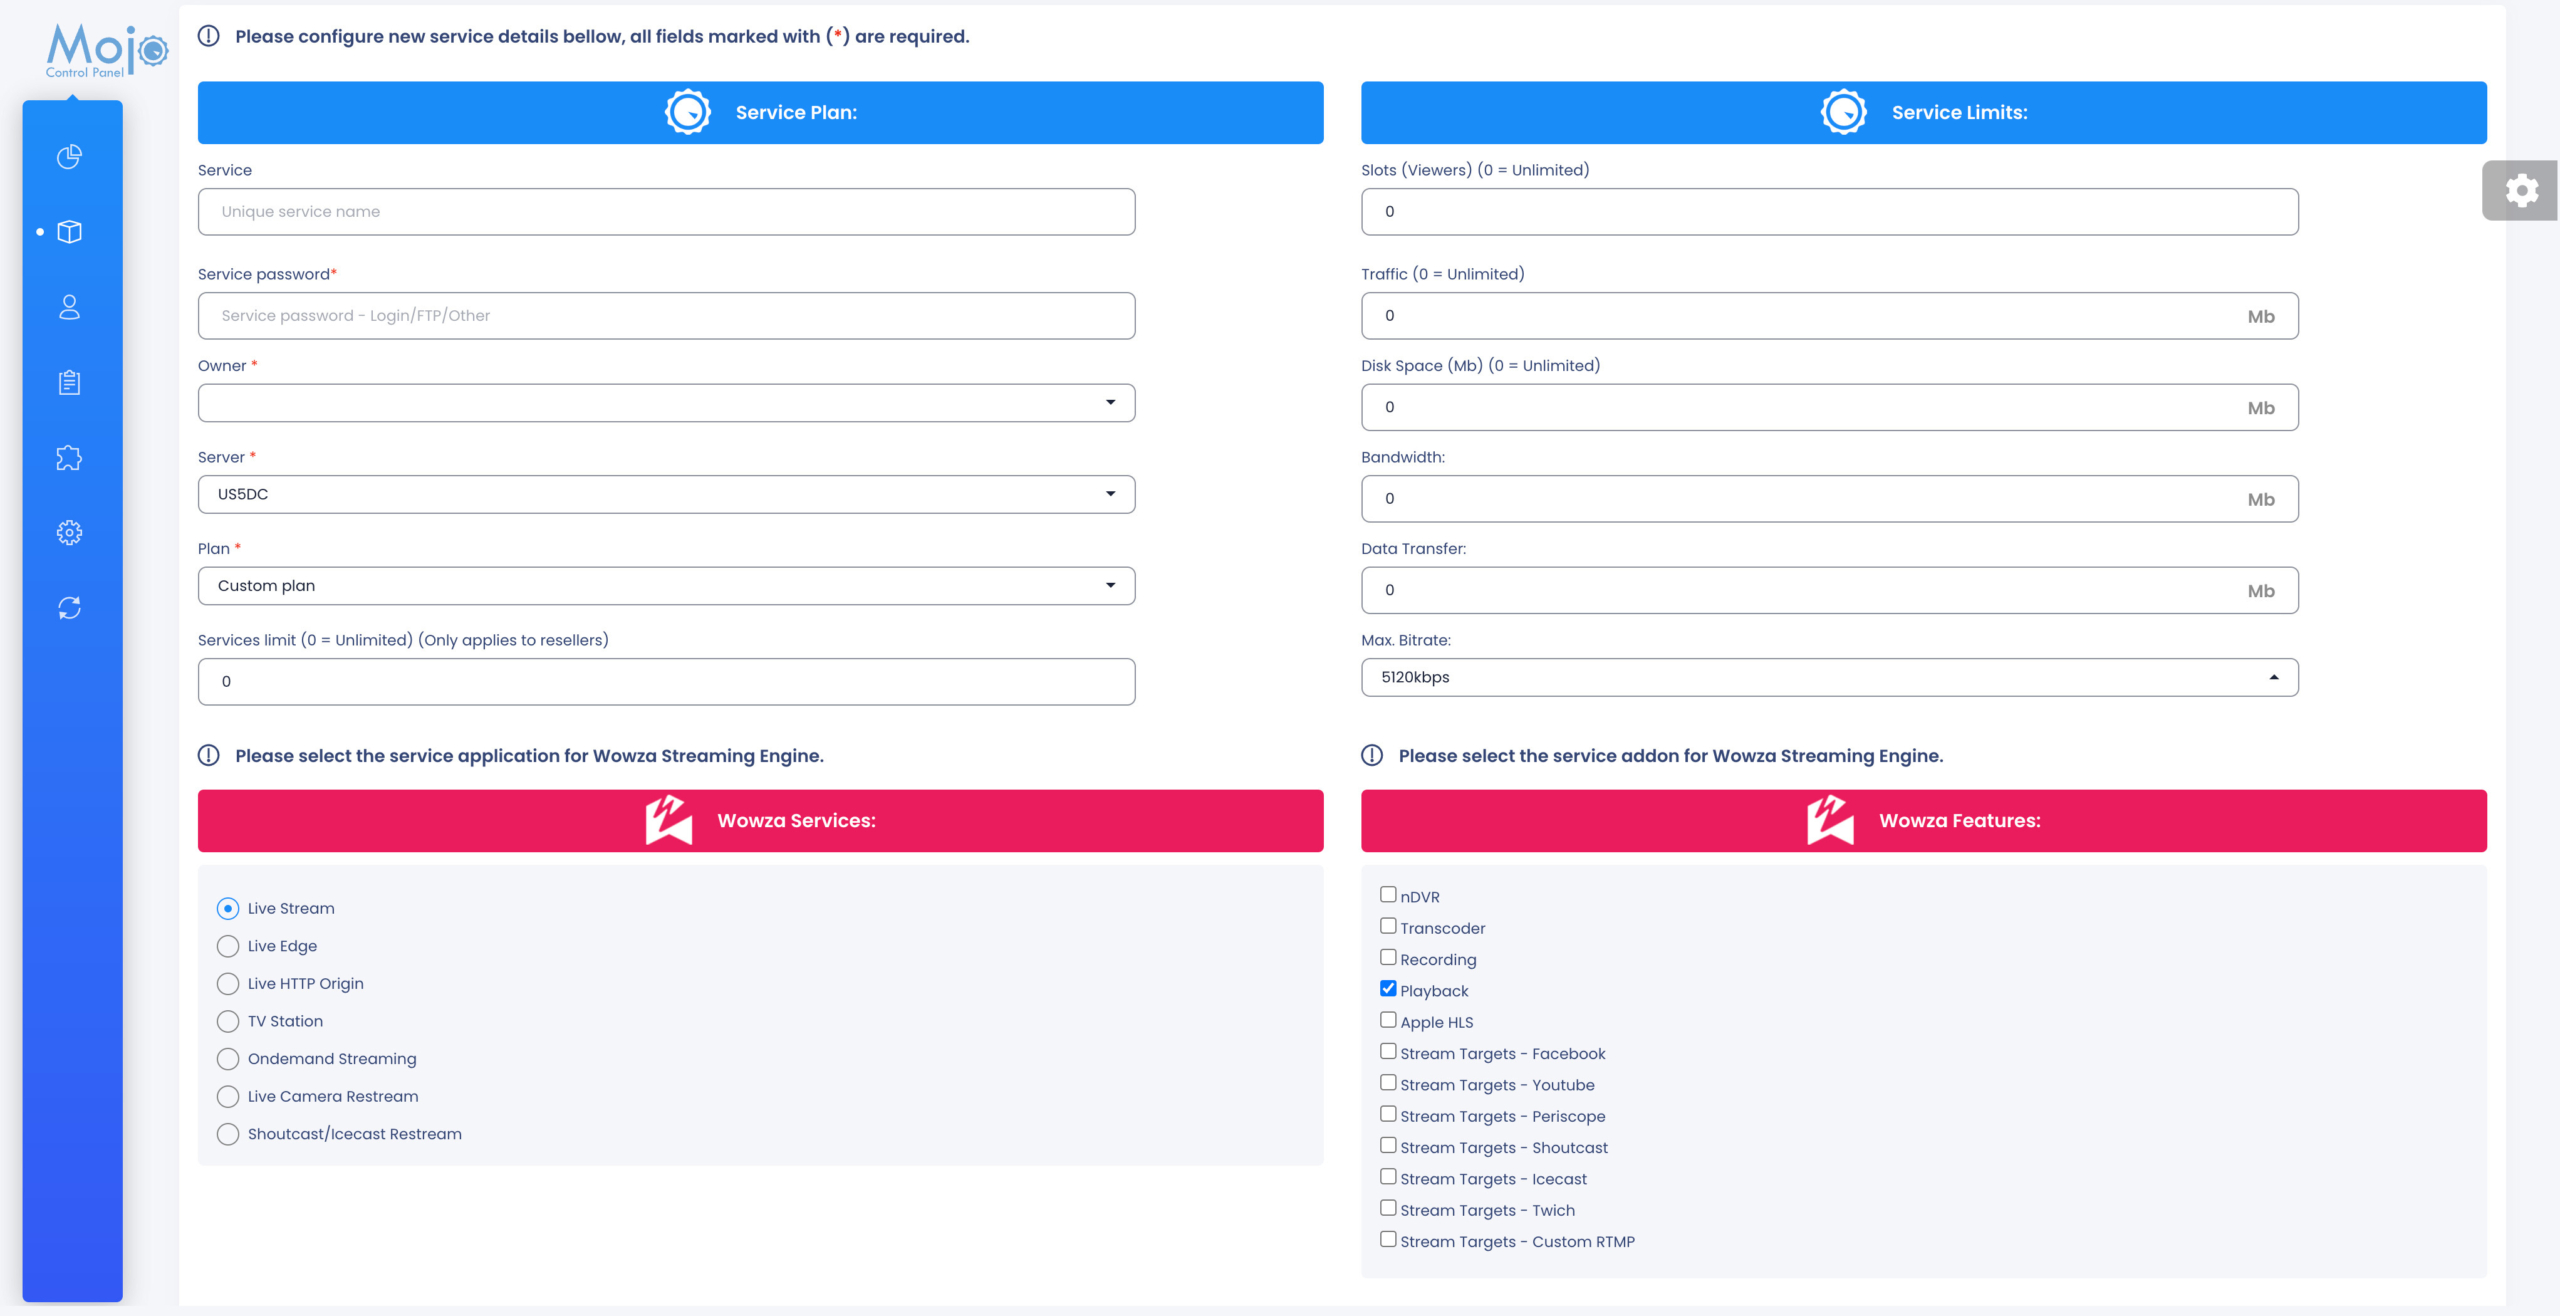
Add Application Service
Configure a new service by completing the service plan fields. You can add applications for six streaming use cases (described below) in MojoCP.
*Live Streaming, Live Edge, Live HTTP Origin, TvStation, On-demand Streaming, Live IP Camera, ShoutCast/Icecast*
Log in to your MojoCP account and navigate to the “Services” tab in the top menu bar.
- Click on “Service” in the sub-menu.
- Click on the “Add Service Application” button located in the upper-right corner of the screen.
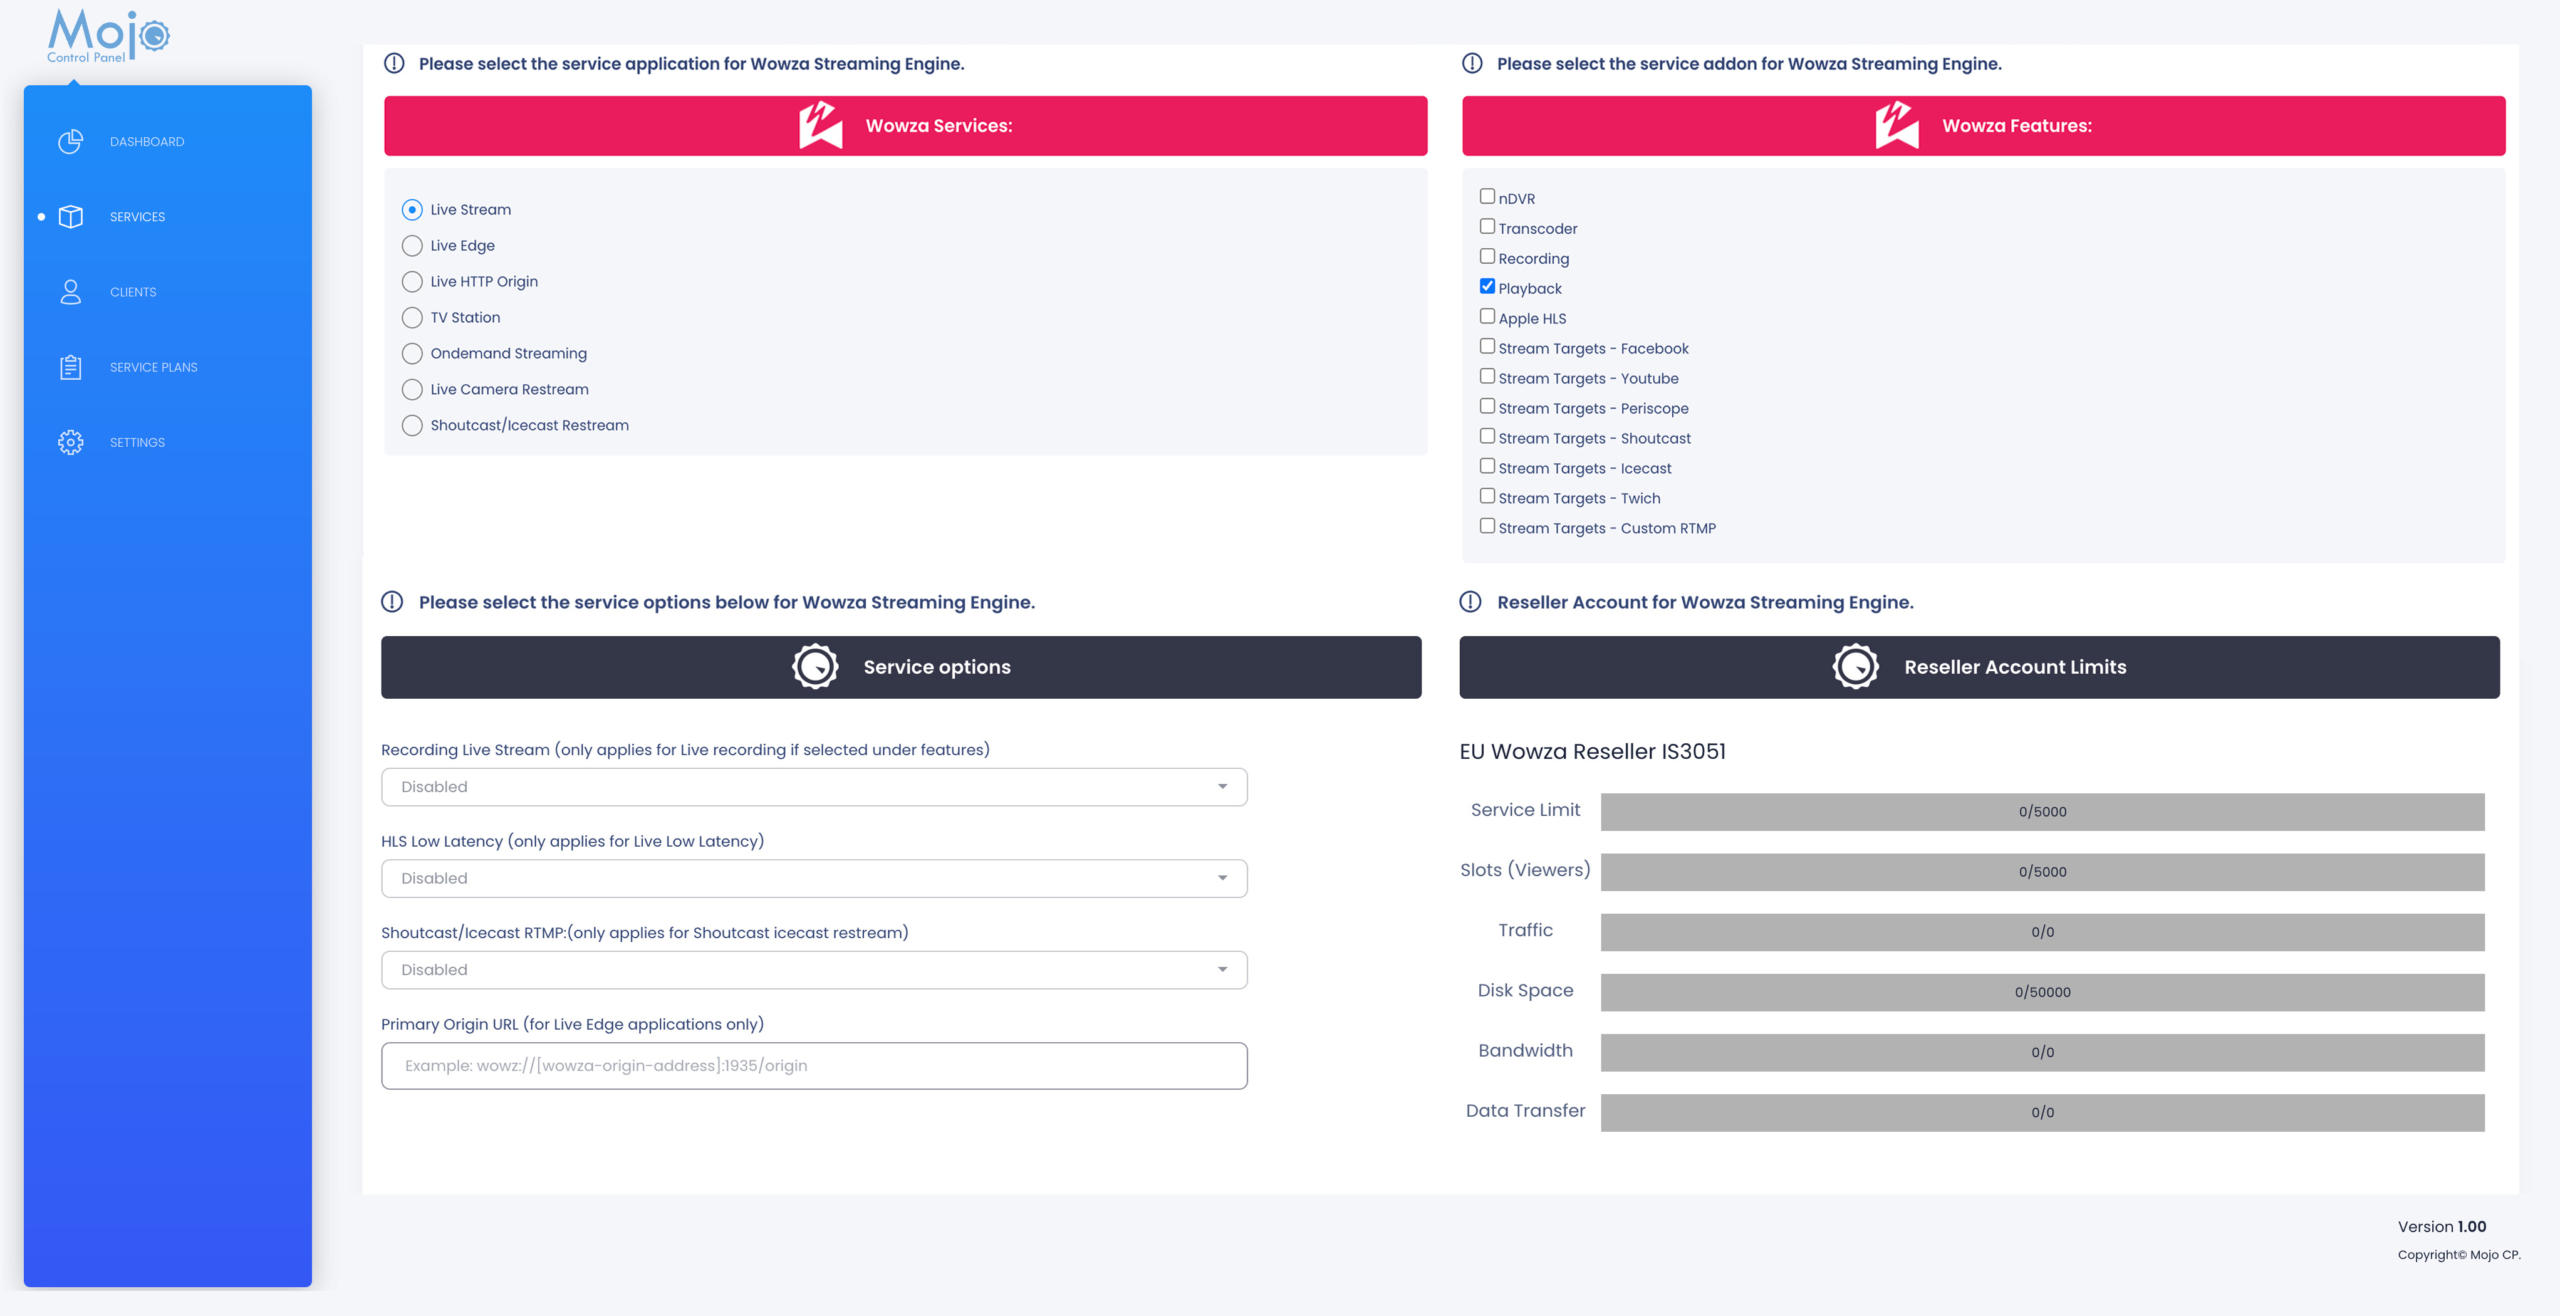
- Application Services:
Enter a unique name for your application in the “Service” field.(lower case without Spaces). - Service Password:
Enter password for your application in the “Service Password” field.
(values are case-sensitive and can only contain alphanumeric, period (.), underscore (_), and hyphen (-) characters.) - Owner:
Use the “Owner” drop-down menu to select the user to which the application should be applied. - Plan:
Select a plan for your application using the “Plan” drop-down menu, or create a custom plan. - Slots (Viewers):
Determine the maximum number of viewers at any given time using the “Slots (Viewers)” field. - Traffic:
Allocate a monthly traffic limit for the application in the “Traffic” field. (0 = Unlimited) - Disk Space:
Allocate a disk space limit for the application in the “Disk Space (Mb)” field.
(Only Applies for CloudTV Station and On-demand. For Live Stream only a minimum Value requires For Live: 50 MB) - Bandwidth:
Allocate a monthly bandwidth limit for the application in the “Bandwidth” field.(0 = Unlimited) - Data Transfer:
Allocate a monthly data transfer limit for the application in the “Data Transfer” field.(0 = Unlimited) - Max. Bitrate:
Select the maximum bitrate for the application from the “Max. Bitrate” drop-down menu. - Application Type:
Select the application type using the “Application Type” drop-down menu. - Application Add-ons:
If available, select any application add-ons from the “Application Add-ons” field. - Click the “Save” button to create the service application.
That’s it! Your new service application has now been created and is ready to use.
Server Limit
Reseller Account Limits refer to the maximum number of streaming application services that can be created based on the chosen plan for reseller accounts. These limits are displayed under the stream plan feature and include service limits, slots (viewers), traffic, disk space, bandwidth, and data transfer. The meter usage is available to track usage and prevent exceeding the allocated resources. By monitoring these limits, resellers can optimize their use of resources and ensure that they are staying within their account’s capacity.
More Videos:
Video tutorials: Reseller Guide for your reseller account. Reseller Guide